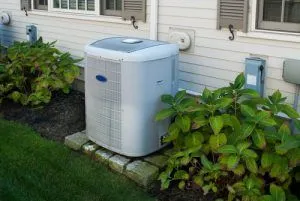
Whether you just had an HVAC system installed for the first time and you want to make sure it was installed correctly, or your system is experiencing an issue that you want to troubleshoot, it’s a good idea to learn how to properly test your HVAC system. Testing your system can help you discover an issue that you may be able to solve before it becomes a major problem, thanks to early detection.
If you happen to discover an issue during the test and you’re not sure how to proceed, give our fine folks at Ambient Edge a call. We can provide you with a speedy diagnosis and give you suggestions on what your next steps should be. If you decide to hire us for the repair, your diagnostic call becomes absolutely free, so what have you got to lose?
Testing the Thermostat
The first thing you should do to test your HVAC system is to test the thermostat. This is the easiest way to tell if your system is working properly. All you need to do is compare the readout on your thermostat with the readout on a thermometer that is not connected to your HVAC system. If there is a difference in the temperature, even by a degree, then this may be a sign that your thermostat is not accurately measuring the temperature of your house.
This may not seem like a big deal at first, but if your thermostat is not reading your home’s temperature properly, it may signal your air conditioner or furnace to turn on when it is not yet necessary for it to do so. This results in higher electric bills and more wear and tear on your system than is necessary, and it can reduce your system’s lifespan.
This may be a simple fix, so don’t panic. Let our team at Ambient Edge take a look for you to be sure.
Performing a Cooling Test
The best time to perform a cooling test is when the temperature stops wavering and it has been consistently over 65 degrees Fahrenheit for a few days. You should never run a cooling test when the temperature is lower than 60 degrees Fahrenheit, as this can put undue stress on your AC’s compressor.
To perform the test, set the thermostat to auto-regulate to the temperature, then set the target temperature to one at which you feel most comfortable. For many folks, this is between 76 and 78 degrees Fahrenheit. You should hear the condenser and fans start right up.
While the air conditioner is doing its thing, listen for any weird sounds that could indicate an HVAC issue, such as a rattle, a squeak, or a slapping sound. Rattling almost always indicates a loose connection somewhere or a part that has gotten loose, while a slapping sound usually means something is stuck in the blower. As we know from cars, squeaking usually means some part somewhere needs lubrication or a belt needs to be replaced.
Check Your Filter
A dirty air filter causes more problems than you can imagine, so the filter is definitely one of the things you should check during your HVAC test. You should change your filter before the start of the new season, and you should clean it often – more often if your system runs non-stop.
You should especially change your filters more often if you have pets, or if you live in a home with carpeting or one that is located near an environment that generates a lot of dust and debris, like a construction zone or a farm. Normally, you should change your filter every 90 days or so, but if any of these situations apply, you should change it at least every 60, perhaps even more often.
When a filter gets dirty, it lets less clean air through. This makes your machine work extra hard because it thinks you’re not getting as much cool air as you should – which you’re not. A dirty filter also allows pollutants and allergens to circulate throughout your home. There comes a point when cleaning it is just not enough and it needs to be replaced.
Check Your Ducts
When checking your ducts, it’s important to establish which ducts are the return ducts and which are the supply ducts. To do this, simply place a tissue over the registers. If the register sucks it in, it’s a return duct, and if it blows it away it’s a supply duct.
Once you’ve figured this out, turn on your AC and set the temperature way below your current room temperature so that it runs long enough for you to conduct a test. Next, tape a thermometer inside your closest supply duct, let the AC run for about 10 minutes, then record that temperature. Then, do the same with your return duct.
Once this is done, calculate the difference between the two readings. If the difference is 20 degrees, you know everything is running smoothly. If it’s less than 20 degrees, then your air conditioning may require maintenance to figure out what’s wrong and fix it.
Need Help with Your HVAC System After Performing a Test? Call Ambient Edge Today!
If you’ve discovered a problem during your HVAC system test, and you’re not sure how to fix it, give our team at Ambient Edge a call to take a look. You can call us, or by sending us a message on our website. Don’t charge into the harsher months with a system that’s not up to snuff. Call Ambient Edge today, and enjoy peace of mind!


