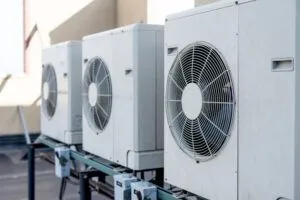
Warmer weather means your air conditioning units must work harder than ever to keep your home comfortable and cool. If you’ve given your AC a break over the winter months, it’s wise to schedule an inspection or give the equipment a once-over for yourself. If you find your home is less cool than you expect, it could be from dirty air conditioner coils.
Dust and other debris can build up on these components and put unnecessary strain on your AC unit’s performance. Cleaning the condenser and evaporator coils isn’t difficult and can be done quickly and efficiently by a skilled HVAC technician from Ambient Edge. However, if you have DIY skills and experience, contact our Las Vegas air conditioning repair, service, and installation you can trust.
Why and How Often Should I Clean My Air Conditioner Coils?
Your AC coils, which include both condenser and evaporator coils, help transfer humidity and heat from your home, which is part of how the entire system cools the air inside. If the coils are dirty or dusty, it makes it much harder for the equipment to do its job. This means your AC components struggle to perform efficiently, and eventually, your whole system will need repair or replacement much sooner than expected.
When it comes to how often you should clean your AC coils, remember that it’s part of your ongoing homeowner maintenance, not just a “one-and-done” task. However, how often you should clean them depends on your lifestyle. Some factors that may require you to perform this job more often include:
- You have pets that shed hair or produce a lot of dander.
- Someone in your home smokes a lot.
- Your air filters clog up frequently or quickly.
- There’s a lot of dust or air pollution in your neighborhood or city.
- You notice your AC unit isn’t cooling well or the airflow is low.
Without regular upkeep, dirty coils can shorten the life of your HVAC unit. If you’ve just purchased your home or it’s been a while since you had AC maintenance done, it’s worth a few minutes to examine this component. If left unchecked, clogged condenser and evaporator coils could be one of many reasons why your central air unit stops working.
How to Clean Your AC Coils at Home
If you want to try your hand at cleaning the AC coils in your home, you’ll need some tools, water, coil cleaner, and instructions on how to do it. Remember, you can always contact the Ambient Edge technicians to help if you want professional guidance. Here are the tools and materials to get started:
- A reversible impact driver with ¼” and 5/16” SAE nut driver heads or manual nut drivers in those sizes
- A heavy-duty scrub or bristle brush
- Evaporator coil cleaner for the evaporator coil
- A water hose for cleaning the condenser coil
You can purchase most materials at your home repair store, and your water hose should reach where your condenser coils are located. If you’d prefer to make your own evaporator coil cleanser, mix warm water with a few drops of dish detergent in a spray bottle to spray onto the coils and help dissolve the buildup. You can also mix white vinegar and distilled water in a 1:1 ratio in another spray bottle and apply it after cleaning to help reduce mold and mildew buildup.
Where Is the Evaporator Coil Located?
The evaporator coil on a central HVAC unit will usually be mounted to the furnace unit or be in its own fan coil cabinet. The exact location depends on the brand and size of your air handling unit, which is frequently installed in your attic or possibly on your rooftop in the Las Vegas area. You can open the cabinet by using the nut driver heads on the impact driver or the manual nut drivers.
Where Is the Condensor Coil Located?
The condenser coil releases heat from your home to the outside air and can be found on the outside unit. It can be easy to spot or may have a wire coil guard. You might need to remove the top of the unit’s casing to access the condenser coil.
Cleaning Your AC Coils: Step by Step
If you’re ready to try cleaning the coils on your own, make sure you understand the different parts of your AC system. Then, gather your tools and follow the steps below. Be sure to have the number for Ambient Edge handy in case you run into any problems or want to have the professionals take over.
- Turn off the power to the AC system: Go to the electrical main circuit box for your home and flip the AC breaker to “Off.”
- Locate your evaporator and condenser coils: Refer to our discussion earlier about where to find them for your system.
- Remove the coil housing: Depending on which one you’re working on, either open the evaporator coil cabinet with the hex nut driver or use a screwdriver to open the condenser coil covering.
- Brush the coil: Use a soft-bristled brush to gently remove dirt, dust, and debris from the coil.
- Use coil cleanser: Spray storebought or homemade coil cleanser and wait a few minutes for it to saturate the dirt. For outside condenser coils, you can spray the coil clean with a water hose. For indoor evaporator coils in your attic, use a soft cloth to wipe them clean.
- Close the housing back up: Allow the coil to air dry completely (about 30 minutes) before re-installing the covering and turning the power back on to the AC system.
If you’re still experiencing problems or the system doesn’t work when you switch the power back on, contact Ambient Edge. With our VIP Maintenance Club, you can schedule routine visits and repair services that save you the headache of DIY upkeep. We also save you money since you pay no service fees (normally $99 a visit), plus you get a 10% discount on repairs and a two-year warranty on all our work.
Contact us to learn more or schedule your HVAC inspection today!


